

This is a guest post by the knowledgeable and crazy-talented Cathy Topping at Two10 Solutions.
Have you ever sat down and worked out how much time you spend creating your social media graphics every month?
Obviously that figure will very much depend on how many platforms you use, and how often you create new content to share.
I’m willing to bet, however, that you spend way more time on this that you need to.
Creating your social media graphics is an inescapable reality of running an online business. But it doesn’t have to be a time consuming black hole that eats into your productivity every month.
Get some systems and templates in place, and you’ll be able to create all of your social media graphics in under 2 hours a month.
And a bonus? They’ll be consistently on-brand.
Here’s what you need to do:
1. Create a brand style guide
If you don’t have one of these already, you should spend the time setting it up. It doesn’t have to be fancy or complicated, but its purpose is to help you decide (and then keep to!) your key design decisions.
A brand style guide should include:
- Your logo
- Primary & secondary colours
- Primary & secondary font choices
- Photography /imagery examples
If you spend some time initially creating this 1 page reference, it will help you stop changing your mind and experimenting, every time you make a graphic. The truth is we’re all guilty of this, but to get efficient you need to stop!
(A word from The Copy Detective: When I started creating more graphical elements of my marketing, I didn’t have a plan or a style guide. Cathy helpfully pointed out that I was diluting my branding with all my different looks. If you want someone to see an image and know that it’s from your business, this is a must. Sorry Cathy, back to you!)
Here’s an example of a style guide I use for my business:
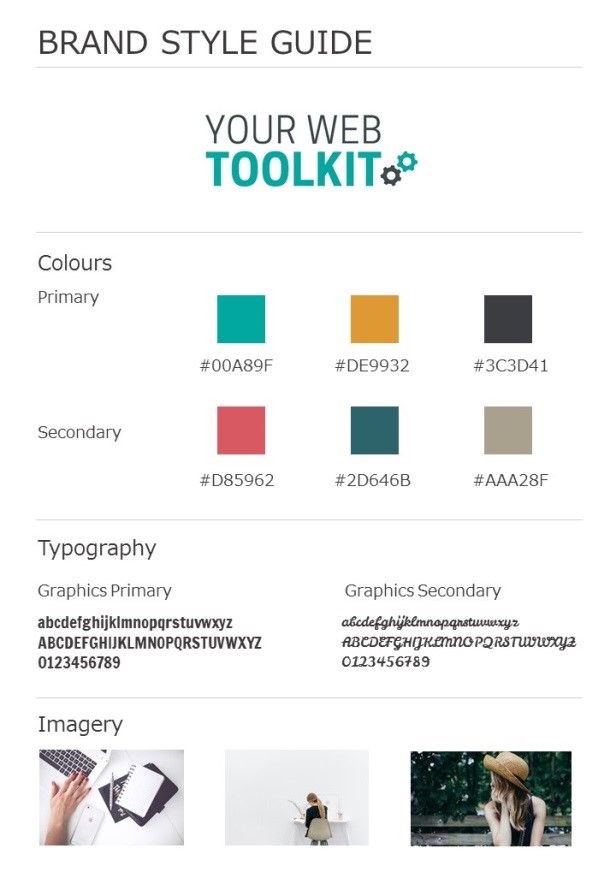
You can create something like this within a program like PowerPoint, or an online tool like Canva.
2. Use Canva to create templates
You’ve got your style guide created, so now you need to set up some templates.
Templates are the key to managing your time productively, and Canva have got your back with this one.
While setting the templates up, allow yourself the time to experiment with different layouts. Work out what fits your brand, including any existing visual marketing that you use.
And don’t forget, you’ve already set up your brand guidelines, so stick to your decisions around colours and fonts.
You can create a few different templates, so that your social media visuals aren’t always really similar.
Yes, it takes time to set up the initial templates, but once they’re done, it’s a breeze to create individual graphics.
3. How to create templates
For this post, I’m going to run through setting up a template for a blog post image.
The logic applies across all your social media platforms, so set each one up, and you’ll have everything ready to go at a moment’s notice.
Pick the relevant layout
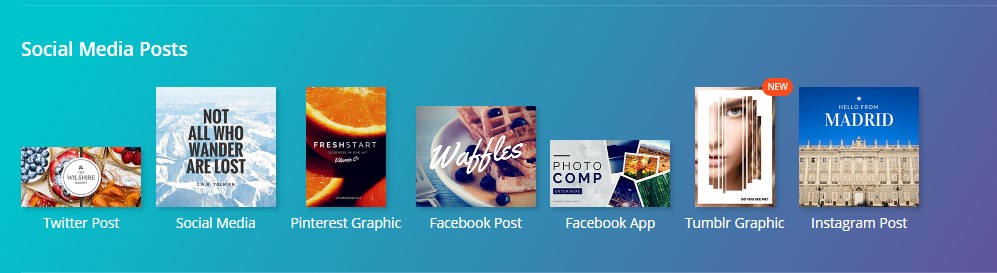
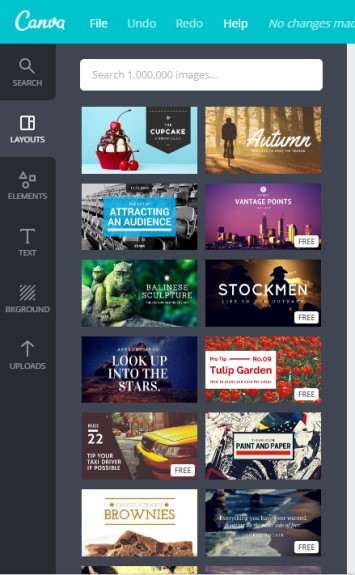
Canva offer lots of templates you can use as a starting point. They are set up with the correct dimensions for each social media platform, so you just pick one and get designing.
For your blog header, select the “Blog Title” for your page layout.
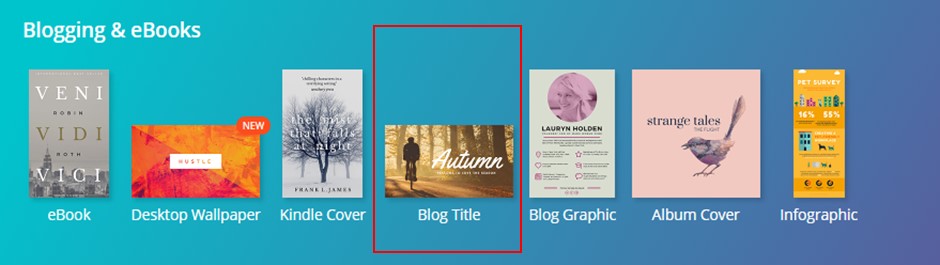
Canva offers a selection of design ideas to use as a starting point. You can pick one of these, or start with a blank page and dive in.
Design 1 or 2 layouts to use as a template
- Spend this time really thinking about how you want your imagery to represent your brand
- Create 1 or 2 designs that you can use and tweak, over and over
- Use Canva’s inbuilt photography or upload your own photographs from other sources
- Keep referring to your brand guidelines
- Create 1 template for each design, on each platform
For each new blog post, create your header image
Here’s where it gets really clever!
Canva allows you to add new pages below the one that you’re working on.
Each template becomes a reference file of all your images. You can quickly copy the previous page, update the image and content, and you’re done!

Each time you need a new image for a blog post, follow these steps:
- Copy the page
- Update the images(s), change your text, and rejig slightly to make it fit the new content
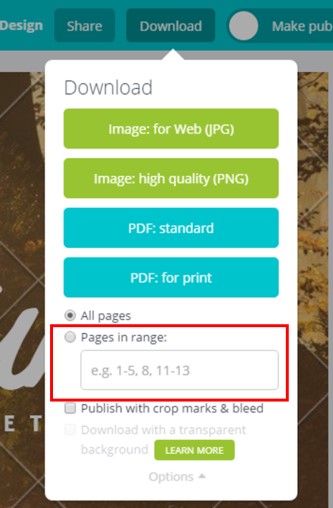
- Export the new image as a JPG
- You can select which page you want to export, so pick the new one that you’ve created.
4. How long will this take?
Setting up your brand guidelines and templates is going to involve an initial time investment from you.
If you’ve already been creating social media graphics for your blog, you can just refine what you’ve already done to make it more consistent.
If you’re starting from scratch, it may take a little longer initially, but in the long run, you will save loads of time.
But this is not just about time. It’s about brand consistency.
This approach will keep you focused and consistent, and with your brand a consistent look is really important.
So…let’s break it down!
How many templates will you need?
This will vary from business to business, and you’ll also find that some social media platforms are better at pulling your images from your website than others.
Examples of templates you might set up:
- A blog header – this will usually pull across to your Facebook page, Twitter account and Google+ without too much hassle
- A Facebook image template – if you’re doing things like posting quote images, or creating other graphics to post directly into Facebook, it’s a good idea to set up a template for this, as the dimensions are different
- A Pinterest template – the dimensions for Pinterest are specific, so create this as its own template.
- An Instagram image – by creating a template with the correct dimensions, you don’t risk the vital information in your image being cropped off
- Call to action (CTA) – You could create a template for a visual CTA for the bottom of each blog post
How long will this take?
Initial setup
- Brand guidelines: 30 minutes
- Each social media template: 15-30 minutes
- In the example I’ve given, there are 5 templates to set up, so about 1.25 – 2.5 hours
Total time: between 2-3 hours
Ongoing time commitment
With the templates in place, it should only take you less than 5 minutes to create each graphic.
So, if you have 5 graphics to create for each blog post, that’s 25 minutes
If you write 4 blog posts a month, that comes to under 2 hours a month. To create all your social media graphics for each blog post you write.
Here’s another way to look at it.
Once you have everything set up, it will take you less than 5 minutes to create an image to use on social media.
Now, what are you going to do with all that time you’ve saved?

3 Responses
Hi Cathy,
To be honest, I have stopped using the images in my blog post for now.
I had used Canva to built images and it did amazing. Nice guide. Choosing your branding, colors and making sure it looks in sync with your image does the trick.
Having a ready to go template which can be edited as per article requirements saves a ton of time.
Beautiful post. Stay Awesome.
Hey Rohan!
Thanks for your kind words. I’m a big fan of templates, across all aspects of my business. It makes life so much easier 🙂
Cheers,
Cathy
Hey Cathy,
Great article, I have used Canva tool several times to create images. Its really easy to use.